The Deadlift - Anvil Training Series 12
By Marshall Officer
What is the Anvil Training Series?
The Anvil Training Series is a series of 12 articles throughout 2020 about key training concepts, written for the general reader. Physical training, in some form or another, should be a part of everyone’s life. Most of the basic concepts are very easy to understand and implement, although these days - the industry has become muddied with complicated variations of basic concepts that can make choosing how to train quite intimidating. These articles are here so that you don’t need a degree and ten years’ experience to separate what matters from what doesn’t, and aim to help you navigate the muddy and ever-changing waters of the online fad fitness industry.
Introduction
If you’ve been following the Training Series articles and podcasts this year, you’ll already know that this is the final addition. Firstly - thank you for taking the time to read my ramblings. I am not the most qualified person in the training industry - far from it. I’m not even a very accomplished powerlifter, and at the time of writing this series - I am barely two years into powerlifting-specific training, and have never set foot on a platform to compete. I am, however, extremely passionate about strength. Training has been an enormous part of my life for the past decade - and lifting heavy has literally been what helped me make it to tomorrow during some of the more difficult parts of my life. A strong man once wrote “the iron never lies to you” (REF 1), and although I was initially drawn to powerlifting because of its unique combination of individual progress in a supportive team environment - I have since focussed my entire life on helping others become stronger. I chose to do so because of the unique coaches I have come across in my desperate attempt to learn everything there is to know about strength training.
If my lack of experience, qualifications, or accolades dissuades you from listening to what I have to say - I completely understand. However, if you are one of the few who sticks around regardless, know this: I have spent the past two years seeking out as much information as I possibly can on the subject of strength. I will always be the first to say that I will never know everything. How I train people will never be the only way to do it, nor will it be the best way for everyone. Teaching people how to become stronger will always live somewhere in the middle of art and science, and any coach worth their salt will understand that knowing how to lift and knowing how to teach are two entirely different beasts. The training series is not meant to be the definitive edition on everything strength, it is my best attempt to summarise everything I have learned so far for those of you who haven’t got the time or the ability to spend your days with blinders on to everything except the world of lifting. It is just the beginning, and if these articles help you even just a little along your strength journey - I will have accomplished what I set out to achieve when I first sat down and wrote Anvil Training Series 1: The Push.
The King of the Lifts
Everyone who has ever attempted a training program based around the Squat, Bench and Deadlift will have an opinion regarding each of them. Some of the most accomplished powerlifters and powerlifting coaches in the world could spend hours explaining to the average lifter why their favourite lift is the best, the hardest, or the lift worthy of the most attention. Despite this, the deadlift seems to consistently rise to the top of training circles as the King of the Lifts. Why? Well, there are a number of reasons why this is the case. Firstly, picking up something heavy is a test of strength that has been around since the dawn of time. Before the squat rack, the bench, or even the invention of the barbell - a budding challenger to the throne of strength could demonstrate their worth by picking up any heavy object within arms reach. Secondly, picking something up is not just about a strong set of legs or a vice-like grip. If you’ve read my articles on the squat and the bench press, you’ll already know that all three lifts require some degree of full-body engagement when attempting to move the most amount of weight properly - but neither the squat nor the bench demand quite as much as the deadlift does - from the tips of your toes all the way through to the tips of your fingers. Finally, what’s in a name? Neither the squat nor the bench requires lifting a weight from a dead stop - the deadlift does.
Personally, I think that all three lifts have their own unique challenges. Deadlifting heavy has always felt natural to me - predominantly due to my torso and limb lengths. I think that beginners will always gravitate towards the deadlift, because it’s usually the lift where they can move the most amount of weight before they become practiced in bracing and utilising the stretch reflex. But, despite my difficulties with the squat or my snail-paced progress in the bench press resulting in elation approaching ecstasy when a new PB is achieved - the satisfaction I get from locking out a heavy deadlift is comparable to very little else. A heavy bench is impressive, and a big squat is an incredible sight to behold, but in the eyes of the people - the deadlift still wears the crown.
What is a Deadlift?
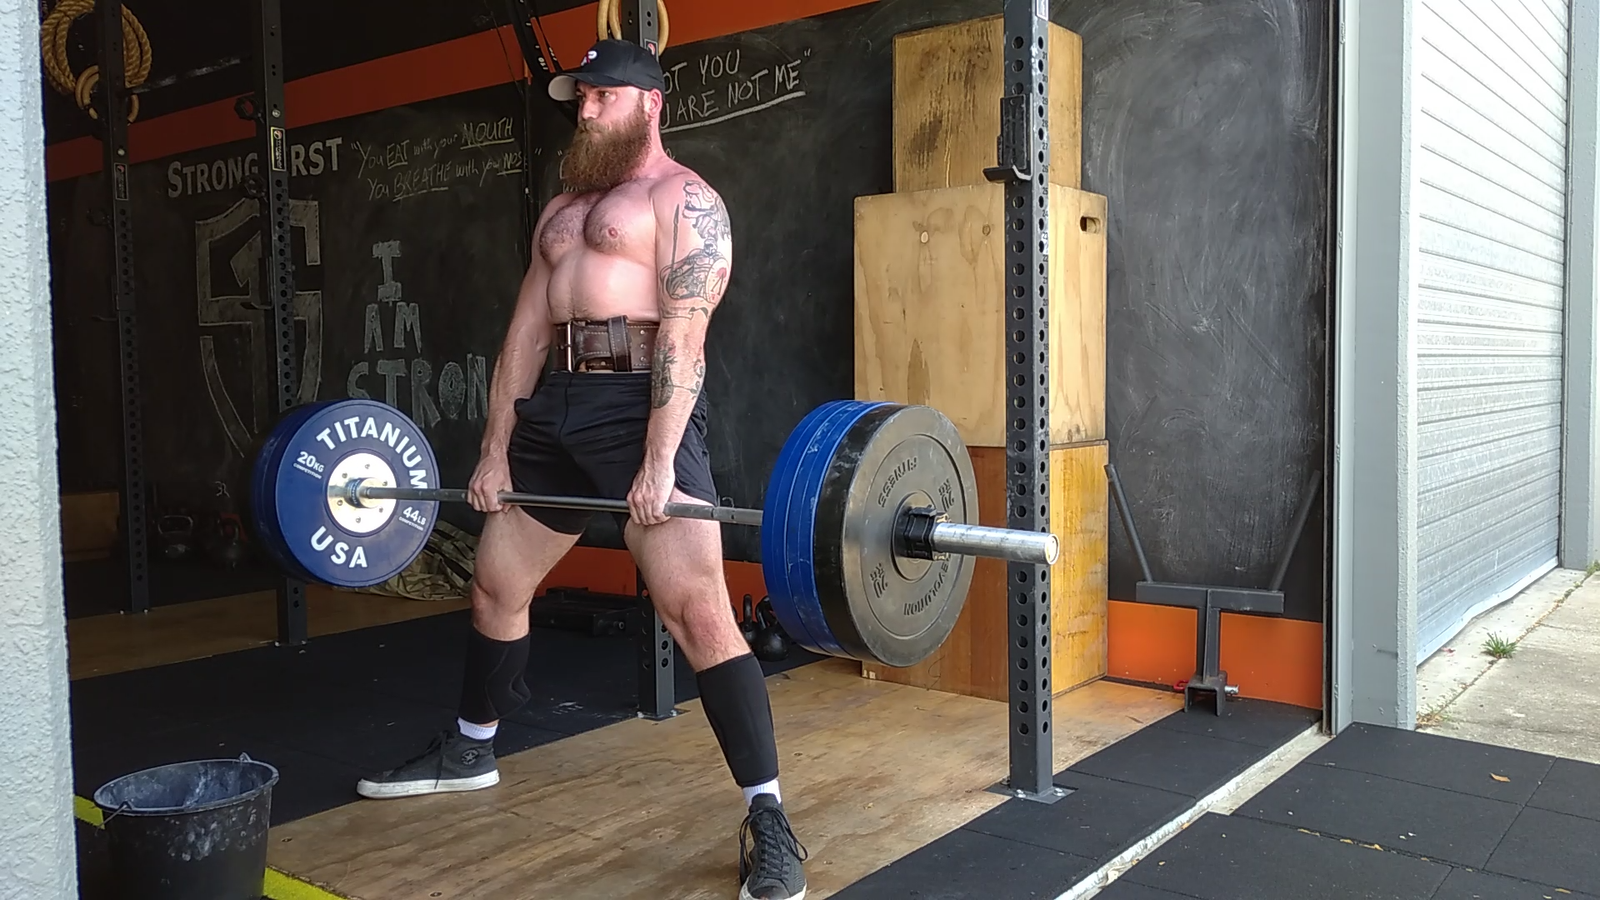
To ensure there is no confusion right from the start, the deadlift is a combination of both a push and a pull. This is due to the involvement of both anterior and posterior leg, as well as the entire posterior chain and upper back. Yes, the same could be said for the squat. In a perfect world, the back should be contracting isometrically throughout the lift - however, because the weight is held in the hands, there is a degree of dynamic contraction from the lats. This leads to greater full-body engagement in the deadlift compared to the squat or the bench press, and results in the lift being both a push and a pull. The deadlift is also the only lift out of the big three that begins with the concentric. This adds to its challenge because there is no way to utilise stretch reflex to help build momentum and drive the weight through to lockout. Beginning from a dead stop requires an entirely different approach, and makes the set-up for the deadlift an essential component to success.
I have had clients who, after failing a pull, have adjusted their foot placement backwards or forwards less than an inch - completing the lift with ease on a second attempt. When we look at coaching the deadlift - there is very little that matters more than maximising someone’s personal leverages, and teaching someone to create and maintain tension without relying on an eccentric component for help. Finally, it is necessary to discuss the two main forms of deadlift - conventional and sumo. These terms primarily refer to the placement of the feet - with a conventional stance having the feet directly below the hips and the hands outside the knees, and a sumo stance places the feet wide with the hands inside the knees. Although many old-school lifters will scream from the rooftops of their ivory towers that sumo is cheating, some of the biggest pulls in strength history have been done by sumo-stance lifters. If lifting the most amount of weight is the goal, this speaks for itself.
At the end of the day, the deadlift isn’t a complicated lift. If you remember only one thing from this article, let it be this: a deadlift is nothing more than picking up something heavy. There are safer and more efficient ways to do it, but if all else fails and you’re standing on a platform surrounded by screaming fans, or in an empty gym on a Friday night and the silence is deafening - just brace hard, and pick it up.
Why Deadlift?
Regardless of what gym you go to, or whoever you subscribe to for strength training guidance - the deadlift seems to have a place in every program. I have gone on-record saying that I don’t believe the deadlift should be a part of every training program, and I still believe that. Unlike the squat, this lift has risks and rewards that need to be weighed equally before including them in your training routine. Deadlifting even has a reputation for being unsafe - however, this is arguably due to the lack of focus on technique and the ease of piling plates on the bar, combining to create the perfect ego-lifting storm present in almost every gym across the world. So why would we deadlift, and what are some of the pros and cons that we need to weigh up before adding it to a training program?
Well, the pros are fairly easy. It is one of the best ways to increase full-body strength. The ability to target such a large group of muscles is hard to look past, and there aren’t many other exercises that can develop the posterior chain like the deadlift can. Not to mention, if you are a powerlifter, olympic lifter, or strongman - you probably have to deadlift in some form or another in order to successfully compete. For the general population, or for someone who only has access to a barbell and some plates - it is a great tool with a number of variations that allow you to maintain the strength, stability, and health of a large percentage of your body (especially the oft-neglected non-mirror side). A strong deadlift generally means a decreased risk of injury from bending movements, and it goes a long way in contributing to overall spinal health when done properly. However, just like every other lift, especially when the goal is to use a lot of weight - the key words here are “when done properly”. Any lift attempted with poor technique has the potential to result in injury in both the short and long term, but when it comes to the deadlift - the body is not loaded for an eccentric component first, leading to an increased risk when attempting to get the weight moving in the first place.
As for the cons: I will begin by saying that the majority associated with the deadlift can be negated by prioritising perfect technique above anything else, and using appropriate weights for your personal ability (which, unless you are a professional powerlifter, is less than you think you can pull, bro). However it is important to mention that, due to the sheer amount of force required to complete a heavy deadlift, the concentric-first “starting from a dead stop” nature of the lift, and the amount of full-body engagement required, the deadlift places a higher demand on the central nervous system than any other lift. This means that although it may not result in as much DOMS as eccentric-first lifts (as most muscle damage occurs during the eccentric portion of the lift) - it does take a significant amount of time to properly recover from heavy deadlifts. This means that beginners can easily fall into the trap of overtraining the deadlift, or overtraining the muscle groups involved in the deadlift, increasing the likelihood of injury due to a lack of appropriate recovery.
For a practical example, let’s take my time in the military. I loved deadlifting, and so I would pull heavy as much as I could, at least once a week. Combine this with the lower back intensive nature of the infantry role - with lots of load carriage, bending, twisting, and erratic movement across all types of terrain meant that my lower back spent more time getting beaten up than it spent recovering. My number one con for the deadlift is not that it is unsafe. The number one con is that heavy deadlifts can be an unsafe addition to an already demanding training program, for people that do not need to deadlift for their particular sport or profession. The risks need to be weighed against the rewards, and as I have said before - if you have to choose between training the squat or the deadlift, always choose the squat. I’m aware that many coaches out there may disagree with me, however I ask them to keep this in mind - not everyone needs to deadlift, and the posterior chain can be trained effectively in other ways without having to worry about increased CNS demand, recovery time, and potential for ego-lifting. Variations like the Romanian deadlift, stiff-legged deadlift, good morning, or even certain types of box squat may be a better fit in a program for someone who already has a lot of force going through their lower back on a daily basis.
To go into more detail for those who do have to deadlift, the reasons why should be fairly apparent. A powerlifter needs to deadlift because it is an essential part of their competition - and goes a long way towards a big total. Although less is generally more when it comes to deadlift training and making progress, it is important not to neglect the deadlift in favour of chasing a big squat. Deadlift technique is extremely difficult to master, and some time should be spent every week practising your individual technique to learn how to maximise your leverages and build speed safely with sub-maximal weights.
Olympic lifters should include some form of deadlift in their training, whether it is from the clean position, or with a snatch grip, because the more you can pick up off the ground, the more you will inevitably be able to lift overhead. Although the technique for an olympic lifter is not the same as a traditional powerlifting deadlift, and I will not be covering olympic lifting start positions in this article - it is a valuable exercise and should not be ignored.
Strongman competitions almost always involve some form of deadlift, although the object you may be picking up might not be as simple as a barbell and olympic sized plates. Regardless of this variety, it is essential for a strongman competitor to be able to deadlift heavy weights, as demonstrated by the 500kg and 501kg deadlifts of World Record holders Eddie Hall and Hafþór Björnsson. Although strongman competitions allow the use of wrist straps, they do not allow the use of a sumo stance. Regardless, I believe both forms of deadlift should be trained, as they complement each other extremely well, and the sumo stance develops hip and glute strength more effectively than almost any other exercise out there.
Finally, for the general population, the deadlift is a great bang for your buck exercise for the posterior chain. Ensuring you focus on perfect technique above all else, and aiming for low to medium rep sets with a full reset between each rep, there are few exercises that will help you build hamstring, quad, glute, lower back, upper back, and grip strength like the deadlift. Get a coach. Don’t go too heavy. Don’t jerk the bar off the ground. Don’t let the back round. Do deadlifts.
What’s doing the work?
As I have said a few times now, the deadlift hits more muscle groups than almost any other exercise. So, the short answer to this question is obvious - everything. However, most of the work is being done by two distinct areas. As I have done in my previous two articles, I will start from the feet and work my way up. Regardless of where you put your feet, it is important to ensure three solid points of contact - through the heel, the big toe, and the outside edge of the foot. This creates the most stable platform for force transfer into the ground - and allows you to effectively engage the rest of the muscles up the chain. Creating this tripod requires the use of the muscles in your feet, meaning even your toes are getting a pump from the deadlift.
Next up, the legs. Both the lower and upper leg are engaged through the deadlift, although the majority of the work is being done by the hamstrings, followed by the quads and hips. Due to the higher hip position than the squat, the posterior (back) of the lower body is taking the brunt of the load - with the quads helping out during lockout. The quads and glutes also do more work in the sumo deadlift, however, the hamstrings are still heavily involved. Moving up from the hips, the entire midsection is working hard during the deadlift. To complete a heavy deadlift, a lot of stability is required from the core, especially around the lumbar spine. A strong lower back is essential to ensuring good technique, as well as the rigidity required to allow the hips to move through to lockout.
The second of the two distinct areas doing the work in the deadlift is the upper back and arms. The upper back, especially the lats, are involved in stabilising the spine and keeping the bar in the correct position throughout the lift. The arms isometrically contract throughout the entirety of the lift, and even your forearms and the muscles in your hands are playing their part - purely by doing their best not to drop the bar. Although chalk, mixed or hook grips, straps, and hooks can go a long way in helping you lift more weight - your hands and arms still play a necessary role in deadlifting. Generating full-body tension is essential for a successful heavy deadlift, and full-body tension requires muscular engagement from your entire body, so if you are trying to train your entire body with one exercise, get tight and pull heavy.
Teach Me (Teach Me) How to Deadlift
Success or failure in any of the big three lifts is generally determined by the set-up, but no more so than for the deadlift. As I have stated before, the deadlift relies on a lifter’s ability to maximise their personal leverages, as well as generate and maintain full-body tension from before they even begin the lift - all the way through to lockout, without the advantage of eccentric loading and muscle stretch reflex. Keeping this in mind, I will be covering a beginner’s guide to technique for both the sumo and conventional deadlift, starting from foot placement in the set-up, all the way through to how to lower the bar for different training benefits.
Foot Placement (Conventional)
The conventional deadlift begins with the feet inside the hands. Width is a contentious issue, with lifters generally imitating their favourite strength athletes as seen on social media. Unfortunately, there are very few people out there with a similar build to the world’s greatest strongmen - and yet there are no end of people imitating Eddie Hall and Hafþór Björnsson’s wide conventional deadlift stance. The reason these world record-holding deadlifters stand the way they do is because they are huge men, weighing close to 300kg. Their legs literally don’t go any closer together - but yours probably do. So, when it comes to the conventional deadlift, a narrow, toes-forward jump-stance is usually the most effective. To figure out your stance, jump up and down a few times, and wherever your feet land naturally is a great place to start. Nine times out of ten, this will put your feet directly below your hips. When it comes to toe angle, we want the knees to track over the toes. If your knees track directly forwards, your arms will stay in the right place, so having your toes facing forwards generally helps. However, if you find yourself more comfortable with your toes pointing slightly outwards - then don’t force it. Find where you are comfortable and practice it. When you walk up to the bar to deadlift, the bar should line up directly with your mid-foot. The bar should not rest on your shins for the conventional deadlift, and you are not a 300kg world record-holding strongman - so you do not need to roll the bar around prior to failing a 180kg pull. Leave the bar where it is, and line it up with the exact middle of your foot.
Foot Placement (Sumo)
For the sumo deadlift, foot placement is completely different. The best leverages for a sumo deadlift require the shin to be as vertical as possible when looked at from the side and the front, when the knee is bent and you grip the bar. A vertical shin means force going straight down into the ground, rather than out to the side - allowing your knees to track over your toes properly. When figuring out your sumo stance, generally it is best to reach down and grab the bar with your hands directly below your shoulders. Place the feet just outside the hands, and then get your back as straight as possible. From here, get a partner or coach to observe your shin angle from the front and the side - making minor adjustments as required. Toe angle will be close to 45 degrees - however, this is an individual thing that depends on hip angle, so find what angle works best for you. The final difference to conventional deadlifts is that your shins will be directly up against the bar. Due to the vertical shin angle, the bar must be touching the shin in order to prevent it from pulling you off balance when you begin the lift.
Knee Position (Conventional)
For the conventional deadlift, the cue I use for knee placement is “bring the shins to the bar”. Once again, we are trying to maximise our leverages - and the ideal conventional position requires a non-vertical shin to facilitate the ideal hip position, shoulder position, and bar path. With the bar placed directly over the mid foot - bringing the shins to the bar instead of the bar to the shins will help the lifter get into an ideal starting position.
Knee Position (Sumo)
I covered this above, but the perfect knee position for the sumo deadlift is directly over the ankles, so the shin appears vertical from both the front and the side. Obviously hip angle will affect this, and it may not be possible to achieve this position right from the beginning. After practice with better mobility, the lifter should strive for a vertical shin keeping the knee over the ankle in the starting position of the sumo deadlift
Hip Position (Conventional)
For the conventional deadlift, the hip position is affected by the shoulder position. As long as the spine is locked into a neutral range during the set up and the shoulders are in the right place - there is no set hip position. Generally, whatever is most comfortable for a lifter as limb lengths will significantly affect this. Ideally, we do not want the hips too low, resulting in the lifter “squatting the deadlift” - nor do we want the hips too high, putting too much emphasis on the lower back and losing most of the leg drive from the deadlift. For lighter weight variations, however, a higher hip position can be used to place more emphasis on the hamstrings and back - from a high hip deadlift, all the way through to straight leg and Romanian deadlifts. These variations are not the safest or most efficient deadlifts for moving the most amount of weight, so this technique should only be used for submaximal weights when attempting to isolate areas of the posterior chain.
Hip Position (Sumo)
The hip position for the sumo deadlift is much more simple than the conventional deadlift. As long as the shins are vertical, the knees are over the ankles, and the lifter is able to lock the spine into a neutral position - the hips should be brought as close to the bar as possible. This results in a much lower hip position compared to the conventional deadlift, allowing the lifter to maximise the use of the hips and quads to move as much weight as safely as possible. This variation also takes a significant amount of pressure away from the lower back, meaning this variation is an excellent exercise for the general population or people whose work places significant stress on the lower back, allowing them to deadlift without overtraining this area.
Shoulder Position
This is where the differences between the two main deadlift variations end. Although amongst the elite powerlifting coaching community, exact shoulder positions for the best deadlift is hotly debated - it is generally agreed that the shoulders should sit directly over the bar. Where this is placed (the actual shoulder joint, the front of the shoulder, or the scap) will differ depending on if you are talking to Dave Tate from EliteFTS, Louie Simmons from Westside, or Swede Burns from The 5th Set. The common theme from all of these high level coaches is that the shoulders must not come forward. If you are only able to focus on one thing during your deadlift set-up, it should be your shoulder position. If you can get your shoulders directly above the bar, the bar will travel directly up, rather than swinging out. This means you won’t be expending energy just preventing the bar from moving around, and you are far less likely to get stuck somewhere around your knees, with all your effort being to pull the bar back in towards you, rather than driving your hips through to lockout. If you watch any elite level deadlifter who is capable of pulling huge amounts of weight, no matter what they do with their feet, their hands, their hips, or their stance - they get their shoulders directly above (or even slightly behind) the bar.
Now that I have covered the key differences between the two stances, the technique for the rest of the deadlift is fairly self-explanatory. This means that you should take time to master these parts of the set up - foot placement, knee position, hip position, and shoulder position. Once you can replicate these every single time, a safe and heavy deadlift is fairly natural. When gripping the bar, it is essential that the arms are used as hooks, and do not do any actual “pulling”. When you reach down to grab the bar, try to make your arms as long as possible - grip the bar directly below the shoulders, and squeeze as tight as you can. Other than that, forget about them. Why? Because attempting to curl or hitch the bar up using the muscles in your arms is extremely dangerous, and can happen quite easily with a mixed grip. When lifting potentially hundreds of kilos, your biceps are not prime movers, and are more likely to snap off than contribute anything of value. A good cue to prevent your biceps from getting involved is to flex your triceps as you grab the bar, forcing your arms into full extension. It is also worth discussing the types of grips for the deadlift. Without going into the equipment you can use to assist with grip strength for extremely heavy pulls - there are three main types of grip for deadlifting.
The first is a neutral, or double overhand grip. This is the weakest grip, but also the best way to limit the weight on the bar to prevent you from hurting yourself. For the general population, if you can’t hold onto the bar with a neutral grip, don’t deadlift it. This keeps the deadlift safe, as well as building your grip strength as much as possible. For powerlifters, or other strength competitors, where grip should not limit how much weight you need to pull - an alternate grip can be used. This is done by placing one hand on the bar facing towards you, and the other hand facing away from you. This will allow you to lift much more weight, but can also cause minor imbalances over time. One way to prevent these minor imbalances is to swap your hands every rep, or every set, when training. Another thing to keep in mind with the alternate grip is your grip width. Ensure your hands are still directly below your shoulders, as the hand facing out has a tendency to be a little further out - which can cause issues with balance, an even brace, and result in sticking points, failure, or even injury over long periods of time. Finally, for the sadistic powerlifters and olympic lifters out there - there is hook grip. Hook grip is a double overhand grip, however the thumbs are placed underneath the fingertips, locking them in. I would recommend watching a hook grip tutorial online before attempting this grip, as well as starting extremely light and building up over a long period of time - as it can be extremely painful for beginners. It is a strong grip for a well-trained lifter, notably Jamal Browner, who can deadlift well over 400kg at approximately 105kg body weight using a hook grip.
The next essential component to safe and strong deadlifts is full body rigidity and muscular tension. This is achieved in two main ways. The first is with an effective, well-practiced set up. Being able to get your feet, knees, hips and shoulders into the right position to facilitate the pull - by getting the spine into a neutral position, locking it all in by creating three strong points of contact with the feet, driving the knees slightly out, keeping the chest up, packing the scaps down, and squeezing the bar as tight as you can - is a skill all in itself. This position is not comfortable, and you will be able to feel the tension in your body if done correctly. You need to get comfortable being uncomfortable during the set up for your deadlift.
The second way to create and maintain rigidity and tension in the body is with your brace. A deep, diaphragmatic breath must be taken, either before or after gripping the bar, and the core must be braced as tightly as possible, before the pull is initiated. A belt can be used - however, many coaches recommend the belt be worn one hole looser than the squat, allowing you to get more air into your lungs, expand your chest and your belly, and brace as hard as you can, whilst still being able to get into the correct position for the pull. Some lifters don’t wear a belt for deadlifts, even though they do for squats - because they can’t get into position properly with it on. Sebastian Oreb, the Australian Strength Coach, wears his belt in an unconventional high position on his midsection just to allow the most effective brace while still getting into position for a conventional deadlift. He can pull over 300kg consistently, so whether you agree with his belt position or not - he must be doing something right.
I know what you’re thinking. You’ve just read 10 paragraphs and I haven’t even made it to getting the bar off the ground. But, stick with me. There is one final part of the set-up to a good looking, safe, strong deadlift. If you can practice everything I’ve written about so far, and master it - then the rest of the deadlift is easy. More than any other lift, success or failure in the deadlift is determined by your ability to set up properly and generate tension before the bar ever leaves the ground. Finally, we come to bar slack. Now, transferring all of this tension you have generated into an object completely at rest on the ground isn’t easy. Sure, you can just pull on the bar as hard as possible and hope for the best, however you are working against inertia, and if you can’t overcome it - you stand very little chance of continuing to pull for enough time to get the bar moving, and then keep it moving all the way through to lockout, before your CNS and muscles decide to give out. A much more effective way of breaking inertia is to start slowly, build tension in the bar, get it moving just a little bit, and then accelerate through to lockout as fast as possible.
Let’s use an analogy to help. If your car is completely stopped at the lights, and you slam the pedal all the way to the floor - your car is not going to reach its top speed instantly. This is due to the laws of physics saying that an object at rest requires a certain amount of force to overcome the inertia generated by its relationship to gravity, before movement ever becomes an option. In contrast, if your car is rolling slowly, and you apply acceleration - it will reach its top speed much faster and require far less force to do so. What does this mean for your deadlift? It’s what people mean when they say, “take the slack out of the bar”. This will look different for different people. The number one factor influencing what this actually looks like is the type of bar you are using. If the bar is stiff and rated for a lot of weight, the bar won’t bend at all unless there is a significant amount of weight loaded on it. Most people won’t even see the bar bend unless there is more than 180kg on the bar - meaning if you can’t deadlift heavier than 180kg regularly, “taking the slack out” is more about generating tension, transferring it to the bar, and then beginning the pull, rather than jerking the bar off the ground from a dead stop.
If you are able to train using a deadlift bar, you will be able to physically see and feel the slack coming out of the bar, and the bar will bend to a certain degree depending on how much weight is on it before leaving the ground. Regardless of what type of bar or how much bend you get, it is essential that you remove the slack prior to accelerating to lockout. A good coach will be able to teach you this, and there are many different methods to achieving it - but at some point after gripping the bar before beginning to drive down through the feet into the floor, engage the hips and create a proud chest, engaging the lats, keep the shoulders directly over the bar, and “slowly” apply upwards force to the bar. You may hear a clicking sound, depending on your bar and the plates, but this isn’t guaranteed. A good way to practice this is with pause deadlifts - where you carefully lift the bar an inch off the ground and stop, then drive as fast as you can through to lockout. This should be done with sub-maximal weights for maximum control. The reason I say “slowly” in quotation marks, is because an expert deadlift will be able to do this extremely quickly as part of their set-up - minimising the time spent before pulling, allowing for maximum energy to be used during the pull. If you are not an expert, take the time when you practice. It will pay off in the long run.
Before I get into the pull itself, I will briefly cover the importance of leverages for concentric only lifts versus the muscle stretch-shortening cycle. During a squat or a bench as you lower the weight during the eccentric portion of the lift, the muscles that will be used for the concentric are lengthening under tension. When stretched quickly, your body initiates a nervous system response forcing a strong contraction to prevent hyperextension of the joints involved. This response is known as the 'stretch-shortening cycle’, or ‘myotatic reflex’ - and can assist in a well trained lifter accelerating off the chest, or out of the hole. As I have discussed previously, the faster you are able to lift a weight, the easier it will be - and the involuntary contraction provided by this reflex can go a long way in building momentum to drive a weight through to lockout. The deadlift does not benefit from myotatic reflex, meaning leverages become all the more important in order to provide the greatest chance of success before you even attempt the lift. Understanding biomechanics in general, like keeping the knees over the ankles in a sumo deadlift or having the majority of your body weight behind the bar in a conventional deadlift - are examples of lifters maximising biomechanical leverages to allow for an easier pull. A lifter must also understand their own personal biomechanics - such as their limb lengths, strengths, weaknesses, and how to best achieve full body tension, in order to set the stage for successful, safe, heavy deadlifts.
In great contrast to the detail of the set-up, describing the technique for the pull is extremely simple. For most lifters, the pull comprises two main parts (which also correlate to their sticking points) - off the floor, and past the knees. These two parts have slightly different muscular emphases - and understanding how to use these two different muscle groups will ensure you are successful each time you attempt a deadlift. Once you have taken the slack out of the bar, you need to initiate the pull. This is done by driving down through your feet as hard as possible, attempting to transfer as much force from your body into the floor as you can. For a conventional deadlift, this will simply feel like you are trying to push the world away through your three points of contact. For a sumo deadlift, it will feel slightly different - as you will try to drive both down and outwards to maximise force generation. Cues for this initiation in a sumo deadlift can be “push the floor away”, or “spread the floor”. Once the pull is initiated, speed is king. As the bar reaches your knees, the emphasis shifts from pushing into the floor to driving the hips through to lockout. Rather than trying to pull the bar up, you should be squeezing the glutes and locking the knees out - as this will create the shortest range of movement for the bar to travel, and utilise the far stronger muscle groups of the posterior chain to lock the deadlift out. This technique should also prevent hitching the bar, and stop the lifter from leaning back to try and lock the hips out - which can actually work against a lifter rather than helping. As long as rigidity and tension are maintained through the core and upper back - driving the hips into the bar with maximum force should facilitate a far more effective lockout, and prevent sticking points and technical deterioration such as rounding of the upper or lower back, hitching, and falling off balance.
Many lifters and coaches will discuss the pros and cons of various head positions - where to look, what to do with the shoulders, positions of the thoracic spine and scaps, in order to help a lifter successfully make it from the floor to lockout. My advice to you is this, from all I have learned, read, watched, and coached myself - spend as much time as you possibly can mastering your perfect set-up, that hits all the points explained above. Foot placement and engagement, knee position, shoulders over or slightly behind the bar, as much full body tension and rigidity as you can create, and getting the slack out of the bar. If you can get this right every time, the pull is as simple as every other lift - drive as hard and as fast as possible, and you won’t get stuck. Don’t fixate on your pull, fixate on your set-up. Nail that, and the rest will follow.
Finally, I will briefly cover lowering the bar. In a powerlifting meet, most federations require the bar to be lowered “under control”. This basically means you can drop the bar, with your hands still on it. I would never recommend, under any circumstances, dropping the bar without control. This can lead to huge amounts of force travelling through your body, finding the weakest point (usually your lumbar spine), and potentially causing injury. Always lower the bar under some type of control - however, the degree of control can have a variety of training effects. For maximum carryover to competition lifting and minimal eccentric related DOMS, use a controlled drop. Keep your hands loosely on the bar, but let the weight fall to the ground. For more hypertrophic effects, to increase posterior chain muscle size - a tempo can be added to the eccentric. For example, lowering for three, five, or seven seconds will make lighter weight deadlifts far more challenging, and cause more muscle body damage (sarcoplasmic hypertrophy) to the muscles being stretched. This approach is great for putting on size or promoting blood flow to an area for rehabilitation. Combining slow eccentrics with deadlift variations like Romanian deadlifts or deficit sumo deadlifts is a great way to build the posterior lower body and balance out muscular imbalances from squatting.
Training the Deadlift
When training the deadlift, due to the higher demand placed on the central nervous system - less is usually more. This is primarily because deadlifts are usually a lifter’s best lift, meaning the weights used will be the most out of all three lifts to make progress. As a concentric-only lift, the central nervous system experiences higher levels of recruitment, and combining this with the heaviest weights means one thing - more recovery to make progress. For me, I train deadlift technique once a week, using 55 to 65% of my max plus bands or chains - focussing on nailing my set-up, and speed in the pull. I will do heavy (over 90% 1RM) deadlifts once a month. This works well for me - however, I am always testing and adjusting to find what is best.
Other deadlift specialists can train heavy deadlifts more often, with people like Jamal Browner and Heather Connor posting medium to heavy deadlift sessions on their social media every one to two weeks. My advice to all lifters and coaches for programming the deadlift is that less is more - start slow, maximise recovery time, and if an individual responds well to more frequent sessions, then build up. Starting with too much will probably result in overtraining, fatigue that affects the other two lifts, and potential injury. The deadlift must be trained often enough to make progress - but not so often that a lifter can’t maintain their intensity in any other sessions due to fatigue. It is a delicate balance to strike, as a lifter may not get DOMS from a heavy deadlift session and might feel fine even whilst their CNS is still recovering.
When it comes to total volume, or the sets and reps - it’s best to know what the lifter needs to use the deadlift for. If the lifter is a competitive powerlifter, singles must be the priority. Lots of sets, with the bare minimum of reps and full resets between reps, is the only way to maximise carryover to competition day. A powerlifter leading into a competition should avoid touch-and-go sets, or anything that makes the deadlift easier to break off the ground. They should focus all their time on nailing that first rep - because on meet day, that’s the only chance they’ll get. On the other end of the spectrum, a general population lifter using the deadlift for posterior chain strength and spinal health should look at higher rep sets with submaximal weights and tempo eccentrics. This is the best way to prevent overtraining the deadlift, with a comparatively much lower demand on the central nervous system, and will allow the lifter to control the weight with near perfect technique for every set. Weight on the bar is not a priority for the general population - the focus here is technical perfection and eccentric control. The same goes for a bodybuilder, who can use a multitude of submaximal deadlift variations to really blow up their posterior chain. I have found sets of between 12 and 20 reps with really light weights is a great way to induce hypertrophy, rehabilitate the posterior chain, balance out anterior dominance, and teach a lifter control under fatigue. If you do not have access to a reverse hyperextension, extremely high rep low weight RDL variations are an essential exercise for keeping someone’s lower back healthy and strong.
Finally, a contentious point in the deadlifting community - touch-and-go deadlifts. Whilst they do have great value, they should be avoided by beginners and competitive lifters who are peaking for a meet. The weight should not be bounced off the ground, and I like to tell my lifters to treat the ground like eggshells - to touch the weight down as to not break them. The benefit of touch and go sets is that the lifter will maintain tension for far longer, which can be great for taking a lifter to failure with submaximal weights, training the grip, and inducing hypertrophy. Touch-and-go sets are a tool in your toolbox. Like everything else, prioritise technique, and use them where appropriate.
The final part of training the deadlift is sticking points, and deadlift variations that can help with these. Like I’ve said many times before, with the right set-up, tension, and speed - sticking points will not exist. If you are experiencing a sticking point, look at these three things before throwing variations into your training program to try and band-aid the problem. If you’re getting stuck, your set-up probably sucks, you’re not getting enough air in, you aren’t bracing properly, you’re too slow, or a combination of the above. If you’ve addressed these problems and you’re still getting stuck, the deadlift usually has two main sticking points - which I alluded to earlier. The first is off the floor. This sticking point is usually due to a poor set-up or the inability to transfer tension from the body to the bar. Remember “taking the slack out of the bar?” Well, if you don’t do that - expect to get stuck on the floor. Variations to address getting stuck off the floor are any variation that increases range of motion - for example, deficit deadlifts, conventional deadlifts for sumo lifters, and even stiff leg or Romanian deadlifts. Pause deadlifts are another great example to learn tension control and patience off the floor, before accelerating to lockout.
The second sticking point is usually somewhere around the knees. This sticking point is primarily due to a lifter being unable to get their hips through. This may be caused by a lifter tipping forwards or pulling backwards on the way up, and can be a result of poor foot placement, hips rising too fast, a weak upper back, or a poor neural connection (or weak) glutes. The other main reason lifters fail around the knees is speed. A slow deadlift is a failed deadlift waiting to happen. Variations that are great for addressing sticking points around the knees are rack pulls, block pulls, isometric pulls within 15 degrees of the sticking point, sumo deadlifts for conventional lifters, glute dominant lifts like hip thrusts or short ROM RDLs and good mornings. Non-barbell loading (like dumbbells, kettlebells, or the trap/hex bar) can be used to vary all of these lifts for even more emphasis on different parts. Find what works and stick with it until it stops working. A point to note - with rack and block pulls, it is essential to replicate your technique and position from your deadlift. Otherwise, the carryover to your deadlift will be minimal, and you’ll end up pulling huge weights through a shorter ROM and still getting stuck trying to lock out your deadlift. Although variations are a great way to target weaknesses, remember - specificity matters. If it isn’t similar enough to your deadlift, it isn’t going to help your deadlift.
The Number One Secret to Pulling Big Weight that You’ve Definitely Never Heard Before!
As we approach the end of this article, I would be remiss to not mention CAT. If you haven’t read any of my previous articles, I highly insist on you checking out Training Series 10 and 11, especially reading the final paragraphs on each one about the importance of speed. For those of you who have read those articles, you’ll already know what I’m about to say. When lifting heavy - speed is king. If you want to lift more, you have to lift faster. If you want to lift faster, you have to spend time training to lift faster. I know it sounds obvious, but this should be more common than it actually is. With enough speed, sticking points don’t exist. Over time, you should be capable of driving your lifts from full extension through to lockout as fast as possible - regardless of the weight on the bar. Of course, the bar will slow down as the weight gets heavier, but there is no such thing as a slow max effort attempt. I guarantee you - every successful world record squat, bench and deadlift was lifted as fast as that lifter could possibly lift it. If not, they would have failed. To train for these successful max effort attempts, time must also be spent lifting submaximal weights as fast as possible. While control is important, and technique should be your number one priority, once you are a competent lifter who can control your lifts - speed must become your priority if you want to become as strong as possible in the shortest amount of time.
There are two main ways to train for speed, which I will briefly mention. These are Compensatory Acceleration Training (CAT), and Accommodating Resistance. CAT simply describes the type of training done with submaximal weights (usually around 70% of the lifters 1RM), lifted as fast as possible for every rep. It is training done at a high intensity, usually with lots of low rep sets for maximum carryover to the platform. If you want to lift the most amount of weight for one total rep, CAT is the best way to prepare yourself.
Accommodating Resistance describes training done with bands or chains - meaning the weight usually gets harder to lift, the closer the lifter gets to lockout. This forces a lifter to push even harder as their joint angles become stronger, and is one of the best ways to teach CAT. Whether a lifter has done CAT before, they will have to accelerate through the entire concentric lift if they hope to be successful when using accommodating resistance - and the carryover to lifting big weights is huge. Just look at Westside Barbell - who have promoted accommodating resistance for years, and have some of the strongest, fastest raw and geared lifters of all time.
For more detail, I highly recommend reading this article by Josh Bryant - https://www.elitefts.com/education/compensatory-acceleration-training-maximizing-each-rep-each-set/
And this article by Dave Tate - https://www.t-nation.com/training/accommodating-resistance
Conclusion
After writing my longest article of the year, there is not much I have left to say. Once again, thank you for reading. I know that there are few people out there as excited by the squat, bench press and deadlift as I am - and writing these has been as much a passion project for myself as it has been to help anyone out there with a thirst for knowledge about an incredibly niche topic such as lifting. I love strength - and will advocate it for anyone regardless of age, gender, injury history, or level of fitness. The physical and mental health benefits I have seen from lifting weights, not only in myself but in those I am close to, I coach or train with, are limitless. The community and their level of support is something I would recommend for anyone, and it is never too late to start. Deadlifts have been one of my favourite things to do for the past ten years, and I still remember the first time I pulled 200kg in Dubai on the way back from a deployment to Afghanistan. Lifting heavy has pulled me from the darkest of places, and the deadlift is one of the best ways to lift heavy - as long as you are safe, and you take the time to master the technique. It is also one of the hardest lifts in which to specialise, and the deadlift specialists of the world hold a special place in hell amongst the powerlifting community - for bombing their squats and benches then swooping in, late in the meet, to take away the win. So, for the special place in my heart that it holds, for all those deadlift specialists out there who have won meets at the last second, and for anyone who has fallen in love with lifting heavy thanks to the first time they grinded through a pull they thought they’d never be able to lift - the deadlift remains the king of all lifts.
Pull Heavy. Train Smart. Train Hard.
References
Westside Barbell Book of Methods, Squat and Deadlift Manual - Both by Louie Simmons
Westside Barbell is the home of some of the biggest deadlifts the world has ever seen - and as such, Louie Simmons is a person worth listening to when it comes to lifting. Not only is he responsible for building these deadlifts, he pioneered training techniques in the Western World that have made lifting accessible for almost anyone. His use of accommodating resistance allows for his lifters to train at a high intensity year-round. He has rehabilitated from two severe back injuries. These two books are on the top of my recommended list for anyone looking to learn more about the deadlift, whether you are a beginner or an advanced lifter.
EliteFTS
EliteFTS continues to be one of the leading free resources on training that exists online. I can’t recommend their content enough - and their owner and founder, Dave Tate, is one of the best coaches out there. Check out their YouTube, as well as any of the articles on their website, for some excellent resources on the deadlift.
Australian Strength Coach
Australian Strength Coach has one of the biggest deadlifts in the southern hemisphere. He also coached the biggest deadlift in the world at the time this article was written, 501kg by Hafþór Björnsson. He also has great educational content on lifting for men and women - and videos on many of the variations to help anyone understand more about learning or coaching the deadlift.
Squat University
Squat University, run by Dr Aaron Horschig, is a book and social media resource on remedial techniques for lifting - primarily the squat. He was an olympic lifter, and is a Doctor of Physical Therapy - and he has experience working with and learning from some of the world’s leading experts on movement. He presents his information clearly, and I have learned an exceptional amount purely from following him on social media. Dr Horschig is great at identifying pain or imbalance, and presents a multitude of options for rehabilitation with an end goal of helping everyone lift pain-free for the rest of their life.
Juggernaut Training Systems
Juggernaut Training Systems run a YouTube channel with some of the best information out there for powerlifters and olympic lifters. They have a number of excellent coaches, and they present a range of information for helping lifters of all levels improve their lifts - especially the squat. Their YouTube channel is an excellent free resource, and I would recommend watching their instructional videos for coaching tips, as well as key points to focus on as a lifter trying to move better and get stronger at the same time.
About Us
Anvil Training and Development is a group of Australian veterans who care about the physical and mental health of veterans and emergency service workers. We’re passionate about ongoing education and working with others to implement positive change.
Instagram: Anvil Training & Development - @anvil.td
Facebook: Anvil Training & Development - @anvil.td
www.anviltd.com
(Article Edited, Proof Read, and Fact-Checked by Charlotte Officer)
VES Mental Health Resources: https://anviltd.com/pages/ves-australian-mental-health-resources


Leave a comment