The Squat - Anvil Training Series 11
By Marshall Officer
What is the Anvil Training Series?
The Anvil Training Series is a series of 12 articles throughout 2020 about key training concepts, written for the general reader. Physical training, in some form or another, should be a part of everyone’s life. Most of the basic concepts are very easy to understand and implement, although these days - the industry has become muddied with complicated variations of basic concepts that can make choosing how to train quite intimidating. These articles are here so that you don’t need a degree and ten years’ experience to separate what matters from what doesn’t, and aim to help you navigate the muddy and ever-changing waters of the online fad fitness industry.
Introduction
Every time I look back on the first time I set foot in a gym, I can’t help but cringe a little. Like any beginner, I had the best of intentions. As human beings, the squat is a natural movement. Babies do it all the time, and they do it exceptionally well. I had been doing a bodyweight variation of the squat my entire life, and somehow - just like every beginner who wants to lift more weight with little regard for technique, it didn’t take long for me to screw everything up. Sure, I could blame ergonomic chairs, every couch into which I’ve ever slumped, my horrible car seat, or even the beating my knees have taken from six years in the army - but these situations are all examples of me taking the easy way out. It’s easy to slouch. It’s easy to adjust your office chair or car seat so it supports your poor posture comfortably. It’s easy to beat your lower body up day in and day out without taking the extra time for rehabilitation and strength work. It’s hard to squat properly - which is probably why everyone loves to skip leg day.
Why Squat?
“More squats.” - The author, every time someone asks how to get better at anything physical or mental, how to experience less pain, or how to recover from any injury.
Anyone who has listened to our podcast, any of our live streams, or even just experienced me as a coach would probably say that if you’ve got a problem - my solution is more squats. This has become something of a running joke - however, there is some seriousness to my answer. To some degree, a good squat works your entire body. It can develop the posterior chain, build anterior leg strength, and it can help build a strong and stable core. Squats can teach better shoulder position for postural improvement, help with head and neck alignment, assist in developing hip, knee and ankle mobility, and they can build explosive strength for higher intensity activities. The squat can help rehabilitate knees, hips, ankles, and back injuries. And, it can help with pain. Sure, the same could probably be said of many other exercises. My main point is that the most helpful exercise for people to balance out imbalances, and turn weakness into strength, is generally the one of which you aren’t doing enough. And, for most people out there - they just aren’t doing enough squats.
In my last article, I wrote about how the bench press might just be one of the least practical exercises to ever exist. There just isn’t an everyday situation that I can picture where the bench press has excellent carryover - how often are you really lying on your back trying to push something off your chest? In stark contrast, the same cannot be said for the squat. Ignoring the upper body isometric component of the squat for now, the demand a squat puts on the lower body is second to none. Someone with a strong, technically excellent squat is also someone with great hip, knee and ankle strength & mobility. It is also someone with a strong and active lower back. This means this person is less likely to suffer injuries and more likely to be able to manage pain in these areas, compared to someone who doesn’t squat (or doesn’t place as much focus on technique). In my humble opinion, skipping leg day is one of the biggest contributors to lower back pain, knee issues, ankle weakness, and poor hip mobility.
I believe it’s important to clarify what I mean by a strong squat, as well as what I mean by excellent technique. In my last article, the bench press, I explained that bench pressing is not a lift that everyone needs to do - even if it seems like a lift that everyone wants to do. The bench press is more risk than reward and is really only necessary for a small group of people who need to pass a bench press-related test (that includes competitive powerlifters and American Footballers). In line with this, a massive bench press is a fairly normal goal. This is not the case for the squat. First of all, I firmly believe that everyone should be squatting two to three times a week. Coaches out there, don’t get up in arms just yet - there is a method to my madness. This statement applies to the general population, and comes under the banner of training for general health and wellbeing. I don’t believe most people should be trying to squat huge amounts of weight - in fact, I think that most people should focus on trying to perfect the bodyweight squat, as well as gearing their training around a squat with excellent technique and very, very gradual progressive overload.
When I refer to a “strong” squat for the general population, all I mean is a number of squat variations with weight. It doesn’t have to be a lot of weight, it just has to be a challenge. Because of our body’s ability to adapt, the weight will gradually increase over time. So, the most important thing for the general population will naturally be excellent technique. What do I mean by this? Excellent technique refers to a full range of movement, with high core engagement and appropriate knee tracking allowing for a neutral lumbar spine position. In the most basic terms - a squat to maximum depth with minimal movement in the lower back. For most people, this will be very difficult to achieve. I believe if this movement is practiced with some type of external load, whether that be a barbell, kettlebell, dumbbells (or anything else practical and within reach) - it will go a long way in fixing many of the problems and pain associated with poor posture and limited mobility we see in the general population today. The average person doesn’t need to max out - but they should be squatting. A lot.
What’s Doing the Work?
When I break down what’s doing the work in the squat - I like to split it between upper and lower body. The reason for this is that most people see the squat as a purely lower body exercise. This might be the case for some very specific variations, predominantly those that are done without load (and the belt squat, a rare but helpful variation) - however, it is not the case for any variation that involves load supported by any part of your upper body. For simplicity’s sake, I will break it down here starting from the ground up, which applies to any squat variation, and include the upper body engagement that applies to loaded squats.
Lower Body Engagement
One thing that I have learned from my time spent improving my own and others’ squats is that you need to start with the feet. Foot engagement in the squat is essential to ensure there are fewer breakdowns along the chain - and a breakdown at the feet is going to cause problems no matter what. I will address technique in the next section - however, it is important to understand that the feet should be actively engaged with three key points of contact: the big toe, the heel, and the outside edge of the foot. When I cue this engagement, I like people to think of screwing their feet outwards into the ground - which should create an arch, followed by pushing the big toe down into the ground. Flat feet, or a lack of proper foot engagement, will inevitably lead to a collapse at the ankle, followed by poor knee tracking, and a closed hip angle. Engage your feet.
Moving upwards, the squat engages both the lower and upper leg. This is important to note, because many people will spend hours on a calf raise trying to get bigger calves, when they should probably just spend more time squatting. A heavy squat will build big, strong lower legs. Master the squat, and then, if you are a competitive bodybuilder - you can worry about spending time on the calf raise to develop a more shapely calf muscle. Moving further up - the squat will require significant effort, and therefore will stimulate, the development of all the muscles on the upper leg. Although the quad is seen as the prime mover of the squat, and for many variations it is - the hamstrings, adductor and abductor groups all get significant engagement from the squat. Depending on the variation, more or less hamstring involvement can be forced - with foot placement and toe orientation leading to more or less adductor or abductor engagement. Additionally, hip angle plays a large role in upper leg and glute engagement - meaning different variations of the squat can be used to build a bigger booty, as well as work on overall hip mobility.
What does this mean? Well, effectively every muscle from the toes up to the hips is involved in some way - and can be targeted with some kind of squat variation. Ankle mobility, knee imbalances, hip mobility, glute size & strength, quad definition, hamstring stability, and calf size are all things you can work on with a squat. It’s not just a great exercise for building big, strong legs. It’s one of the best rehabilitation, prehabilitation, strengthening, stretching, mobility movements out there.
Upper Body Engagement
The main difference between the lower and upper body engagement in the squat is that while lower body muscles will primarily be contracting and relaxing (lengthening and shortening to some extent, depending on the variation) - the upper body muscles are engaged in isometric contraction. This means that they are not lengthening or shortening, but they are contracting statically. Whilst they may not be moving, these muscles are still engaged, making the upper body loaded squat a full-body movement.
Continuing on from the lower body, we reach the core. When I say core, I am referring to both the anterior and posterior muscle groups - the front and side abdominal muscles, and the muscles supporting the lower back. A squat with excellent technique requires the spine to be held in a neutral position. This means not exaggerating the lumbar arch, or experiencing lower back rounding in order to achieve sufficient depth. Excessive movement of the lumbar spine is generally a sign of poor knee tracking, poor glute engagement, and poor core engagement in the squat - and should be corrected quickly. More commonly known as ‘butt wink’, it can lead to disc injuries and lower back pain. It is important to learn how to brace - engaging the core muscles to create as much midsection rigidity as possible, as well as ensuring the lower body is being used properly to avoid rounding of the lower back to achieve depth. Throughout the loaded squat, the entire core should be isometrically contracted. Squats work your core hard.
Finally, the upper body. This is generally dependent on the particular squat variation you are doing - and whether the load is on the front or back of your body. A back squat should have significant upper back isometric engagement, as well as a requirement for a high degree of shoulder mobility. A front-loaded squat will place a huge emphasis on upper back strength, but may not require as much shoulder mobility depending on how it is loaded. Either way - the upper back plays a huge role in a successful squat, and goblet style squats have been shown to build mass in both the upper back, biceps and forearms - meaning that squats can actually give you bigger arms and a stronger back.
For a long time, it was believed that lower-body-dominant compound movements stimulated upper body growth because they released certain growth hormones. Recent research has shown this is not necessarily the case - the upper body development people see from doing lower body compound movements may be caused by the static contractions required to keep the upper body rigid during the movement (meaning you are training the upper body every time you do a challenging lower body exercise). Whatever the case, it is accepted that loaded squats encourage both lower and upper body growth - yet another reason to not skip leg day.
A Beginner’s Guide to Technique
Although your technique will differ slightly for different variations of squats, there are some consistent points that all squats should involve regardless of depth, type, or load. I will be focusing primarily on a barbell squat - however, it is important to remember that whatever way you load your squat, whether you have a barbell on your back or a kettlebell held in front of you, your number one focus should be technique. Good technique will inevitably lead to increased strength - but, strength does not necessarily mean good technique, and strength plus poor technique usually equals injury.
The Set-Up
No matter what type of squat you do - imagine for a minute that you are standing in front of a power rack with a barbell loaded up with the most weight you’ve ever lifted sitting in it. It’s intimidating, knowing you are going to take that weight out, support it with your body, squat down, and stand back up again. What is going through your mind? What are you going to do to ensure you have the best chance of success? Do you have a strategy for if you slow down, hit a sticking point, or start to experience break down? Just like any lift, the secrets to success are tension and speed - as well as the right mental state right from the start. A sloppy set-up will generally result in a sloppy lift - and good technique in your heaviest lifts means practising good technique no matter what weight is on the bar (or in your hands). This means that every squat, no matter what variation, no matter how heavy or light - should be approached like it is the most weight you have ever lifted in your life. This starts with the set-up.
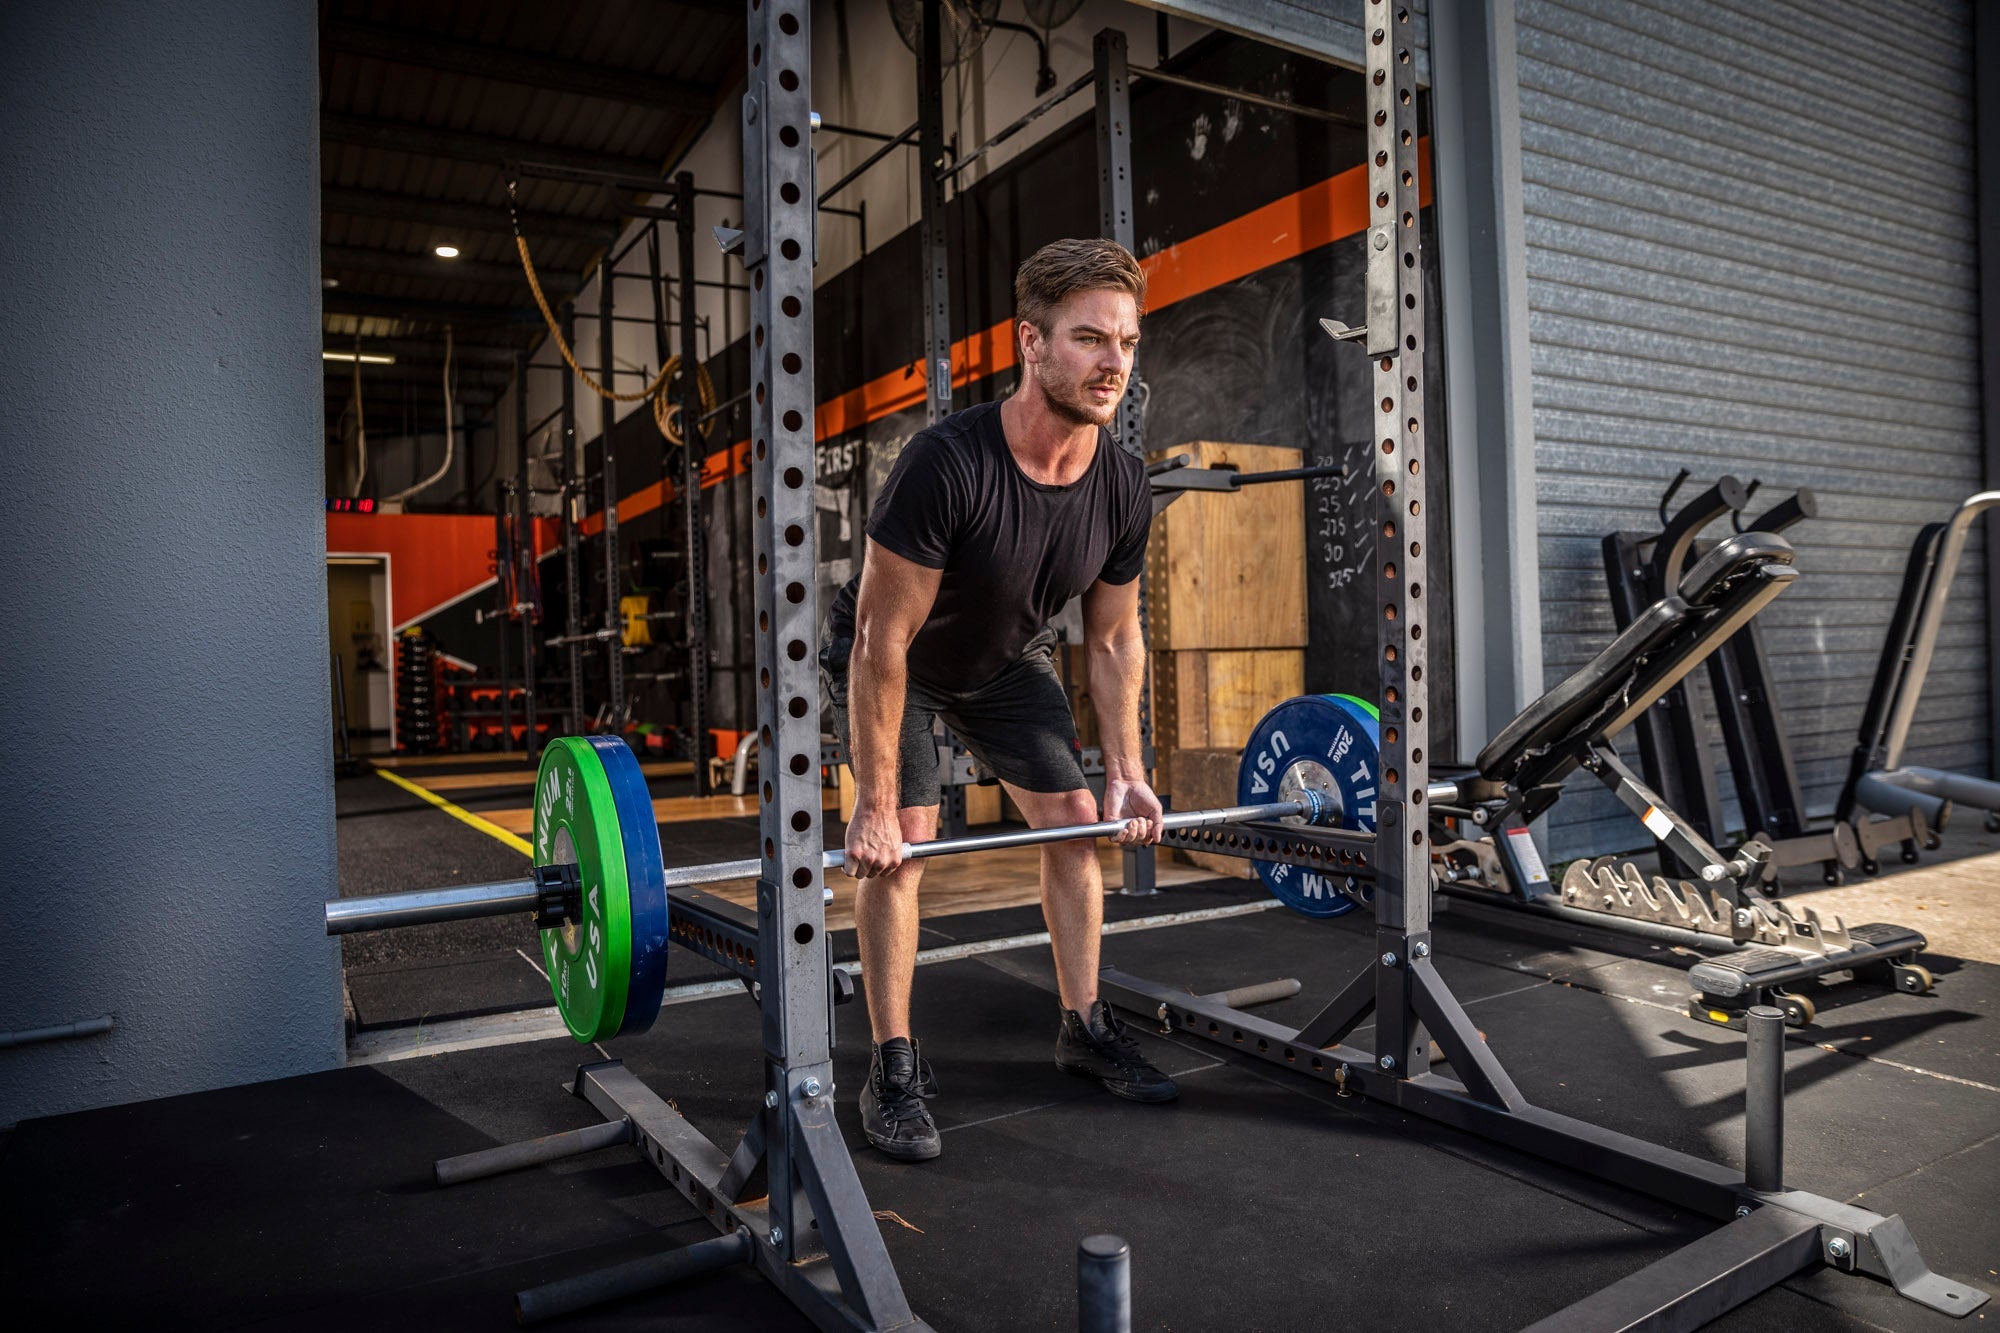
Getting under the bar is your chance to create as much tension as possible in your body. A common and effective cue I have used is to wedge yourself between the bar and the ground. When I train set-up, I start by emphasising hand placement on the bar as evenly as possible. It is important to grip the bar tightly, and once you’ve done so - you should not release it at all. Your wrists should be strong, and whether you have a full grip, half grip, thumbless grip, close grip, or wide grip - it must be consistent and your hands must not move. Moving your head under the bar should be done by bringing yourself down and then up again, rather than forward and backwards. This is your chance to get your upper back in the perfect position - by retracting and depressing your scaps and creating a proud chest. The bar should rest on a natural “shelf” created by your traps (for high bar), your rear delts (for low bar), or even your front delts (for a front squat). This will be slightly different for everyone, but the most important part is to create tension - and for a back squat, you should be able to pull down on the bar hard whilst pressing your upper back into the bar to engage the lats. All of this should be done before you take up any of the weight from the bar.
Before removing the bar from the rack, a deep diaphragmatic (“belly”) breath should be taken, and your core should be braced to create as much rigidity in your midsection as possible. Only now should you take the weight of the bar, using your legs to lift the bar out of the rack - not your lower back. After a brief pause to let the bar stabilise, and assuming you aren’t using a monolift - you should take as few steps as possible to get your feet set. The more steps you take, the more energy you are wasting before squatting. Less movement on the unrack equals greater stored energy for the squat itself. To set your feet, remember what I wrote earlier about screwing them into the ground. This is your time to establish those three points of contact, and maintain them no matter what.
The Descent
If your set-up was done correctly, no matter how much weight is on the bar - it shouldn’t feel “heavy”. If you unrack the bar and it feels like it is going to fold you in half - you probably didn’t do something properly in your set-up. In this case, I would recommend going back and doing it again, because it has a huge amount of carryover into the rest of the squat. Don’t get me wrong, if it’s the most weight you’ve ever lifted in your life, and you have to walk it out - it’s probably going to feel fairly uncomfortable and it will be hard to stay steady. That is inevitable, and I’m not saying the perfect set-up will make even hundreds of kilos feel light. However, it can be the difference between successfully squatting hundreds of kilos, and getting folded in half.
No matter how you squat, the descent begins at the hips. If it doesn’t, you risk failing to properly load the posterior chain prior to commencing the squat. This does not mean you need to do a good morning before bending your knees - it just means that you should hinge slightly at the hips, allowing your posterior muscles to become properly primed, statically engaging the hamstrings and erectors before committing to the descent. Ideally, this will allow you to maintain a neutral spine, hit depth without any butt wink, and use your posterior chain effectively during the ascent of the squat. If you find you are getting butt wink or have trouble hitting depth - you may be rushing this part of the squat, or not sitting back at all when you begin the descent. In my opinion, the main thing you should be focusing on during the beginning of the descent is maximum control. Slow it down, take your time, do it right.
Once you have hinged at the hips, you can commit to the descent. This is not necessarily done slowly, and everyone will have their own perfect pace - however, it is worth noting that a faster descent will generally result in a faster ascent. Faster means it is easier to lose control, so for the beginners out there - don’t worry so much about speed. It will come naturally once you have mastered control. If you screwed your feet in properly during the set-up, your knees should track properly. Ideally, they will track in line with your toes. Some squatters will be more comfortable with their feet facing forwards, some will point their toes out. No matter where your toes are pointing, your knees should track over them. Depending on the structure of your hips - over time, you will find which foot position works best for you to achieve depth. This is an individual thing and takes trial and error to find what works best for you.
Depth may differ depending on what you are trying to achieve as well. For the general population, I would recommend going as deep as possible while maintaining a neutral spine. Over time, this should look like taking your hips, knees, and ankles through their greatest range of movement. This is important as it ensures these joints stay as healthy and strong as possible. However, for powerlifters, there can be an advantage to just passing parallel - as more weight can generally be lifted through a smaller range of movement. For athletes, even a quarter squat can be beneficial, because it is unlikely that a full squat will have great carryover to many sports. At the end of the day, all squatters should spend some time squatting to full depth, for joint health and mobility, but some squatters will specialise in certain variations. Regardless of your depth - key points are ensuring your knees track in line with your toes for optimum biomechanical advantage and safety, and the spine is fixed within a neutral range.
The Ascent
After doing everything you possibly can to maintain control of the bar, your position, your feet engagement, and your descent - the ascent is the time where it should all pay off. This is where you well and truly hit the gas. After you reach whatever depth is required for your squat, whether this be quarter reps for developing explosive power in a transferable athletic position, just below parallel for a powerlifter, or even ass to grass for olympic lifters and general population - you still need to get back up to lockout. Just like in my last article on the bench press, this is where speed is king. When I wrote earlier about approaching every lift as if it has the most weight you’ve ever lifted on the bar - it is essential to put this into practice during the ascent. If you do not lift maximum weights as fast as possible, you won’t lift them at all. With enough speed, there is no such thing as sticking points. Therefore, during the ascent - it is essential to practice dynamic speed and explosive power. Ideally, the intensity for the ascent of every rep will be as close as you can get to 100% - meaning you will get as much as possible out of every rep, regardless of the weight on the bar. Keeping this in mind, it is important not to lose control of the weight at the top of the rep, and to lock out every rep with maximum control. For example, the barbell should not bounce off your shoulders, as this can exponentially increase the risk. A minor exception may be in the front squat, in preparation for a jerk - where you may need to reposition the bar for the final part of a complex lift. For squats, explode out of the hole, and control the lockout.
There are some other key technical points for the ascent that will help with maximising force transfer and maintaining the best possible bar path. Firstly, it is important to maintain your foot engagement through the three points of contact. If your weight shifts too far onto your toes or your heels, you may lose control of the squat and be forced to compensate somewhere else up the chain - either with knee travel or greater use of the lower back. The bar should remain over your mid-foot, allowing you to stay balanced throughout the ascent. Secondly, you must not allow your upper back to cave, or your hips to rise faster than your chest and shoulders. This can be difficult with heavier weights - as your hips are not in direct contact with the load itself. All too commonly I see people allowing their hips to rise, and then turning the squat into a good morning to complete the lockout. This will inevitably lead to one of the most common sticking points in the squat - the upper back caving. To combat this, many cues can be used - “chest up” is one that everyone in my gym is all too familiar with, thanks to me yelling it on a daily basis. Visualising throwing the barbell backwards off your back, or driving your upper back into the bar to initiate the ascent, are two other common cues to correct this. Finally, I want to mention valgus positioning - or knee cave. Maintaining proper foot engagement should prevent your knees from caving in, however - it is important to keep the knees out, and tracking over the toes while driving out of the hole all the way through to lockout. Valgus is fairly common in squatters with poor glute engagement, or squatters with a flat footed position. It is essential to practice good knee position and foot engagement at lighter weights - so that when heavier weights are used, technique remains the same.
Understandably, there is a lot to think about when mastering the squat. However, start slow, and focus on control first. Get your feet right, and take the time to gradually work through a personal checklist every time you set up. It will be complicated at the start, but the more you practice perfect technique - the easier it will be to replicate, until you don’t need to think about anything when you squat except how much stronger you’ve gotten since you first started!
Squat Variations and their Importance
The reason the squat is one of my favourite go-to exercises for everyone, no matter who they are or their training history - is because of the sheer number of variations for this exercise, and the carryover implications of these variations in daily life, strength, and athletic performance. By using different stance, bar, load, and technical variations - we can target almost everything with the squat alone. These are some of my favourite variations, as well as what they focus on, and for what they can be used.
High Bar
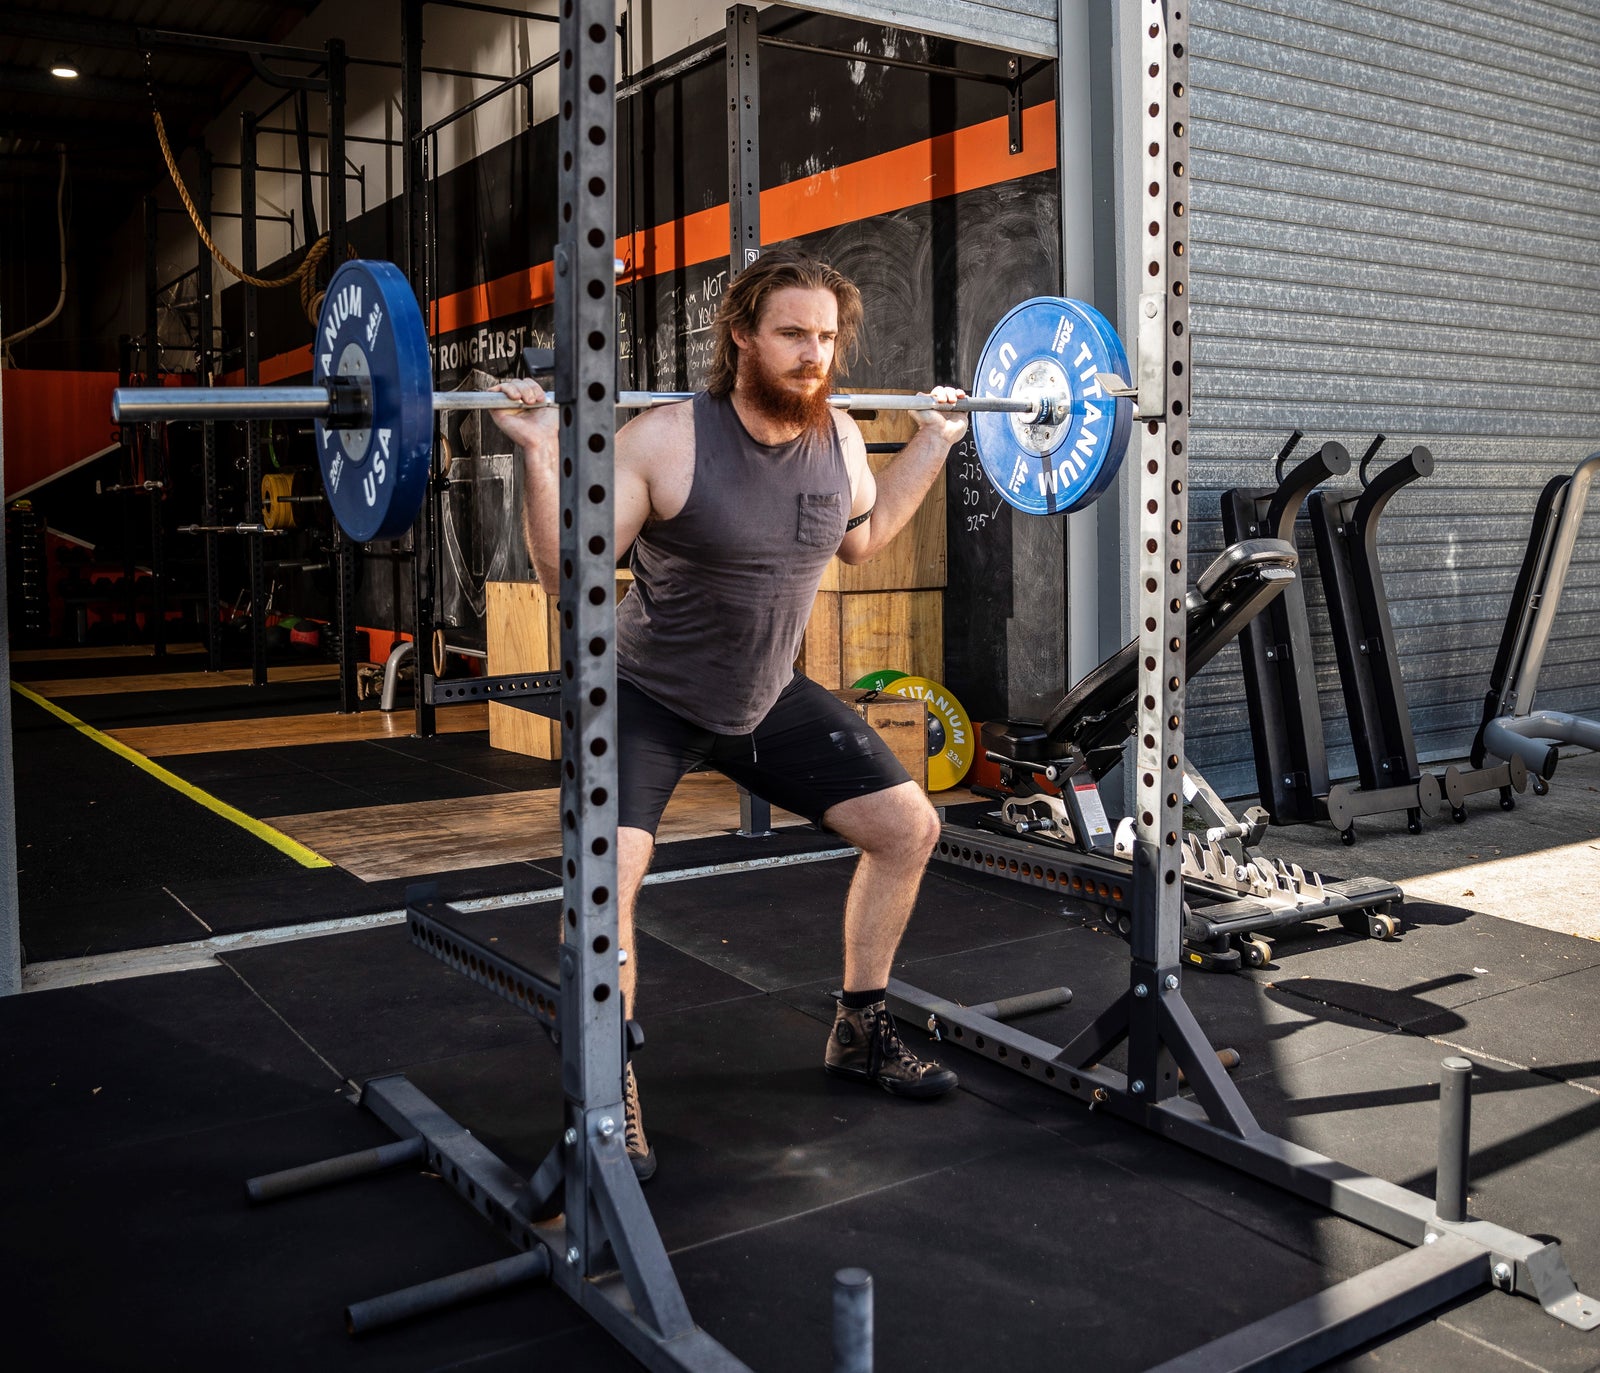
The high bar squat is probably the number one variation with the most amount of carryover for the greatest number of people. This squat is fairly balanced between anterior and posterior engagement - and once good technique is developed, it can be used to move significant weight through the greatest range of motion in a back squat. It places a large focus on the quads and the glutes, with less stress on the hamstrings, the upper & lower back. It is a difficult movement to learn and master - due to a requirement for above average mobility in the hips and ankles. However, progressively overloading a high bar squat and taking it as deep as safely possible on a regular basis will go a long way in developing exceptional mobility and strength in the ankles, knees and hips. The bar position has the potential to put strain on the shoulder and wrist, especially if the squatter does not have adequate mobility in these areas - sitting as high as possible on the back without resting on the neck, on a natural “shelf” in the middle of the upper traps. . By starting wide and gradually bringing the grip in over time, mobility can be developed in these areas by stretching them under load. It is important not to rush this process, as the tendons in these joints do require time to recover. This squat variation is important for general population for mobility, strength and safety through a large range of motion - as well as in the bodybuilding population for the unparalleled range of motion for the glutes and quads, and olympic lifters to provide lower body overload (strengthening their front squat for the snatch and the clean and jerk).
Low Bar
The low bar squat is generally a powerlifter’s best friend. With the bar positioned below the upper traps, on a natural “shelf” created by the rear delts - the range of motion for the squat can be reduced, and the posterior chain can be relied upon to move more weight. A classic low bar squat will require a wider stance to accommodate a more aggressive torso angle - and lifters using this squat will generally appear to be leaning forward when they unrack the bar. To get the bar in the right position, a wider grip will also usually be used in comparison to the high bar squat. Due to the smaller range of motion and greater engagement from the lower back and hamstrings - most lifters will be able to move more weight using this variation (compared to the high bar squat). Downsides to this squat, include a smaller range of movement and less quad engagement. The wider stance generally results in more hip engagement - and this squat is an excellent tool not just for competitive powerlifters, but for people who need to build a stronger posterior chain without relying on deadlifts, or for someone who does not typically train in a wide stance like conventional deadlifters.
Both of the variations above can be additionally varied through different stance widths, toe orientations, or bar types. Using a straight bar can wreak havoc on the shoulders or wrists - and a Safety Squat Bar or Duffalo Bar can be used to reduce this strain, changing the centre of gravity in the lift to shift focus and provide a new challenge or develop a weakness without utilising an entirely new movement.
Box Squats
The Westside and EliteFTS favourite, and a personal favourite when it comes to building the best possible squat technique no matter the person - box squats are a fantastic variation no matter what you’re trying to achieve. First and foremost, the box squat is unparalleled when it comes to coaching the squat. As a coach, being able to make adjustments at both top and bottom positions of a squat is impossible without the use of a box. Not only this, but the ability to progressively work towards a desired depth is extremely difficult without using boxes of varying heights. Asking someone to “go as deep as they can” just can’t compete with setting up a box that sits at the very bottom of their safest possible depth - and then gradually lowering that over time as they become stronger, more mobile, and more confident. Box squats can be used with injured or more vulnerable population groups - such as the elderly, allowing them to safely squat with load without risking instability or further injury. Finally, it is easier to spot a box squat - as the risk of falling over or getting crushed can be mitigated by the ability to just remain seated on a box while a spotter helps remove the weight. Although a powerlifter is never going to compete with a box on the platform, and specificity should certainly be included within a program - the value of the box as a training and development tool should never be overlooked.
The box squat allows for more emphasis to be placed on the posterior chain - by getting the athlete to sit back as far as possible onto the box, the hamstrings and lower back can be effectively engaged and developed. The pause at the bottom, as the athlete releases and re-engages the hips, makes the box squat slightly more difficult - as some of the stretch reflex is removed. This allows someone to be more challenged without just adding more weight, as well as ensuring control of the weight is the main priority. Encouraging someone to sit on the box “as if it is made of eggshells” is a common cue that I use to ensure that people do not collapse onto the box - which always translates to more control in the descent of any other squat variation. Some key points for box squatting - it is not done as a touch-and-go movement. This is known as Squatting to a Box, and does not have the same benefits as proper box squats. When conducting the box squat - the squatter should come to a complete stop on the box, slightly release the hips and pause, followed by regaining tension in the hips and exploding up off the box to lockout. When the tension in the hips is released, it is important to maintain core tension, a neutral lumbar spine, and a tight upper back. Done like this, the box squat creates more time under tension for the upper and lower body - as well as an overcoming isometric component with the hips, providing many benefits a regular squat cannot. Some downsides to the box squat are the lack of carryover to competition, and less tension through the eccentric portion of the lift. A box squat will not result in as many DOMs as a regular squat - it may not build as big legs as a regular squat. Although they should be an essential part of everyone's training program - this should not be the only variation they do.
Front Squats, Goblet Squats, and Zercher Squats
These variations of the squat are possibly the best way to safely achieve maximum depth under load out of all squat variations. All of these squat subtypes involve supporting the load with the front of your body - resulting in the ability to get much deeper into the squat whilst maintaining balance, as there is less requirement for hip angle compared to a back squat. This squat is an essential technique for olympic lifters - as the front and overhead squat are both full-depth squats, and key components of the clean and jerk and the snatch. Nevertheless, this doesn’t mean they should only be done by these athletes. Front-loaded squat variations place more emphasis on the anterior leg muscles - and because of the depth, they take your knee and ankle joints through a greater range of movement than any back squat ever could. The goblet squat is one of my favourite rehabilitation movements, as well as the perfect teaching tool for someone trying to master a bodyweight squat or build mobility in their lower body. Front-loaded squats, combined with pauses or slower eccentric tempos, are a great way to stretch lower body muscles and tendons - and can also be loaded lighter than a back squat and still be equally (if not more) challenging. The goblet and zercher squats have the added benefit of developing the arms and upper back isometrically - due to the weight being supported by the elbows or hands. This adds an upper body component to the squat, allowing you to use the squat to increase training of the full body with less complicated movements. These movements are great for any part of a workout - however, I primarily use them as leg and upper back building accessories, rehabilitation movements for knees and ankles, and as a key part of any lower body warm up. This ensures that proper depth can be achieved without risking flexion of the lower back before you’ve had the chance to promote blood flow to that area of the body.
Single-Leg Variations
Finally, single leg squats are less common but very useful variations for those looking to build extra stability - as well as work through any imbalances they have developed as a part of their daily life or training. Single leg squats are notoriously difficult, and even a bodyweight variation of the single leg squat requires a high level of coordination, strength and mobility. These can be done using a box or from a platform to build the range of movement gradually - and I would recommend this variation for anyone who has suffered a unilateral injury, and is looking to rebuild stability and strength on one side of the body. They’re also a great option for anyone who has mastered the squat, but is looking for an extra challenge. Single leg squats do require a high level of ankle mobility especially, and when done under load - can be a great way to work on ankle mobility and stability for athletes who spend a lot of time explosively moving off one foot, from side to side, or in less stable positions.
Common Sticking Points
As I have said many times before - with enough speed, there is no such thing as sticking points. Over time, however, you will most likely encounter a part of your squat that feels more difficult than others - or that will stop you dead in your tracks if you don’t do everything just right. There are two common sticking points for most people - out of the hole, and the upper back cave. Fixing these sticking points is fairly self explanatory, and generally if the squat is trained with more control, as well as better technique overall - these sticking points will not occur. For those of you dealing with one or both of these, I will explain why they occur and what can be done to fix them.
If you are getting stuck out of the hole, and it isn’t to do with your upper back caving - the most likely scenario is that you are either not generating enough tension during the set-up, or you are failing to maintain this tension during the descent. If you can’t create a significant amount of tension in your core through breathing and bracing, and good technical control of your descent - you will experience force leakage as you attempt to reverse the weight. Instead of that force going back into the bar, it will find other places throughout the chain to escape, resulting in a sticking point. It is essential to become as tight as possible during the set up, and maintain this tension and control through the descent - so that all the force you are capable of generating is available to you as soon as you begin the ascent. This can be trained using box squats, pause squats, or dead stop squats, to ensure tension is maintained in the hole - and the athlete isn’t relying on bouncing out of the hole or collapsing during the descent.
The upper back cave is a second sticking point that is extremely common. This will usually occur when the hips rise faster than the upper back in the squat - the upper back is not strong enough to lift the weight it is supporting while off balance and without the use of the legs to maintain momentum. Developing a strong upper back is key, and this should be a part of any training program. It is also essential to train the correct technique, and cue driving the upper back into the bar - keeping the chest up, or visualising throwing the bar backwards off the back to initiate the ascent. This sticking point can also be trained with box squats, tempo squats, pause squats, and dead stop squats - as well as concentric only squats to force good technique. Front squat variations are also excellent ways to train through this sticking point, as it can be clearly seen when the squat is front loaded if an athlete is getting pulled forward when they initiate the ascent.
The Need for Speed - Part Two
For anyone that hasn’t read any of my articles on Compensatory Acceleration Training - this heading refers to training to lift dynamically, explosively, or with high speed concentrics. I won’t go into a lot of depth - because I recommend that anyone interested in learning more about CAT and accommodating resistance read my previous article on the Bench Press, as well as this article by Josh Bryant - https://www.elitefts.com/education/compensatory-acceleration-training-maximizing-each-rep-each-set/
Further, an article by Dave Tate - https://www.t-nation.com/training/accommodating-resistance
In short, compensatory acceleration training describes lifting any weight as fast as possible (with maximum control), to develop the most efficient neural connections, become as strong as possible, get the most out of every rep, and do everything possible to prevent failure. It is a concept initially developed by a man named Dr Fred Hatfield - who was also known as Dr Squat, and set an all time world record squat of 1014lbs in competition at age 45. He credited this incredible feat to Compensatory Acceleration Training - and his methods have been used to train multiple world record holders in the squat and many other types of lifts. If there is one thing to be learned from this - it is that speed is king, and that the ascent of your squat should be done as explosively, dynamically, and quickly as possible. It is impossible to move a heavy weight slowly - you will either move it as fast as possible, or not at all. If you learn to lift like this, you can become stronger than you have ever thought possible.
Conclusion
I have grown to love the squat. For a very long time, it was my most hated lift. I had little control, I got used to failure, and at one point - I even injured my back squatting. It was a lift that I never thought I would be good at - and yet years later, I continue to look forward to squat days, and am determined to squat bigger and better numbers with more perfect technique than I ever have. The squat isn’t just for lifting heavy weights, it is one of the greatest rehabilitation and strength-building tools in your training repertoire - and if you aren’t squatting at least twice a week, I implore you to start. Gone are the days where skipping leg day is acceptable, and knee injuries are more likely a result of not squatting, than a reason to never do it again. Whether you’re a bodybuilder, a powerlifter, an olympic lifter, an athlete, or just someone looking for healthier knees, feet, ankles, and lower back - get in the gym and get squatting.
More Squats.
Train Smart. Train Hard.
Recommended Reading
Westside Barbell Book of Methods, Squat and Deadlift Manual - Both by Louie Simmons
Westside Barbell is the home of some of the biggest squats the world has ever seen - and as such, Louie Simmons is a person worth listening to when it comes to squatting. Not only is he responsible for building these squats, he pioneered training techniques in the Western World that have made squatting accessible for almost anyone. His use of the box squat and emphasis on accommodating resistance allows for his lifters to train at a high intensity year-round. He has rehabilitated from two severe squat related injuries, including a broken back, to set records in his age and weight class. These two books are on the top of my recommended list for anyone looking to learn more about squatting, whether you are a beginner or an advanced lifter.
EliteFTS
EliteFTS continues to be one of the leading free resources on training that exists online. I can’t recommend their content enough - and their owner and founder, Dave Tate, is one of the best squat coaches out there. Check out their YouTube, as well as any of the articles on their website, for some excellent resources on squatting.
Australian Strength Coach
Australian Strength Coach has one of the biggest squats in the southern hemisphere. He coaches some of the biggest squats in the world. He also has great educational content on squatting for men and women - and videos on many of the variations to help anyone understand more about learning or coaching the squat.
Squat University
Squat University, run by Dr Aaron Horschig, is a book and social media resource on remedial techniques for lifting - primarily the squat. He was an olympic lifter, and is a Doctor of Physical Therapy - and he has experience working with and learning from some of the world’s leading experts on movement. He presents his information clearly, and I have learned an exceptional amount purely from following him on social media. Dr Horschig is great at identifying pain or imbalance, and presents a multitude of options for rehabilitation with an end goal of helping everyone lift pain-free for the rest of their life.
Juggernaut Training Systems
Juggernaut Training Systems run a YouTube channel with some of the best information out there for powerlifters and olympic lifters. They have a number of excellent coaches, and they present a range of information for helping lifters of all levels improve their lifts - especially the squat. Their YouTube channel is an excellent free resource, and I would recommend watching their instructional videos for coaching tips, as well as key points to focus on as a lifter trying to move better and get stronger at the same time.
About Us
Anvil Training and Development is a group of Australian veterans who care about the physical and mental health of veterans and emergency service workers. We’re passionate about ongoing education and working with others to implement positive change.
Instagram: Anvil Training & Development - @anvil.td
Facebook: Anvil Training & Development - @anvil.td
www.anviltd.com
(Article Edited, Proof Read, and Fact-Checked by Charlotte Officer)
VES Mental Health Resources: https://anviltd.com/pages/ves-australian-mental-health-resources


Leave a comment